“Style is a way to say who you are without having to speak.” – Rachel Zoe
As a developer, I sometimes find myself wanting to integrate a preexisting themes into my web applications. But the Rails asset pipeline can make the setup of these themes tricky. So, when I utilize Bootstrap themes, I tend to follow a specific progression in order to get my fancy themes up and running.
Let’s take a look at this process, using the Rival theme from the WrapBootstrap marketplace.
Requiring Dependencies
In order to use components from a theme, we’ll need to successfully require all of the themes assets in the vendor/assets/stylesheets and vendor/assets/javascripts folders. Let’s take a look at our theme in the browser:

For this post, we’ll use an unstyled Cat App, and I’d love to grab this sortable gallery for my kittens. If we right-click on the theme page, we can view the page source.

CSS Dependencies
We’re going to want to grab the CSS and Javascript files from the theme and require them in the correct order in the Rails application. Let’s start with the CSS files – we’ll want to copy and paste the link tags into a new document in our text editor.

From there, let’s modify the link tags paths to fit the CSS Sprockets format, as demonstrated below. Not that the CSS Sprockets require does not include the .css extension.

Now, we’ll copy and paste the Sprockets into our application.css file.

The last step is to ensure that all of the theme’s CSS files are included locally in the vendor/assets/stylesheets folder. In Rival, we’ll copy every file from Site/assets/css, as well as Site/assets/boostrap/css/bootstrap.min.css, into our vendor/assets/stylesheets folder. This will be different for each Bootstrap theme.
Javascript Dependencies
We’ll want to follow the same process for our Javascript script tags. Let’s copy them into a new document.

One thing that I immediately notice is that one of the script tags links to an external resource, not a local file. I don’t know what to do with it yet, so we’ll deal with it later. Note that JS Sprockets do include the .js extension.

Like last time, we’ll copy and paste the Sprockets into our application.js file.

This time, we’ll copy every file from Site/assets/js, as well as Site/assets/boostrap/js/bootstrap.min.js, into our vendor/assets/javascripts folder. Now, if we look at the Javascript console, we get an error regarding the Google Maps API script that we skipped over before.
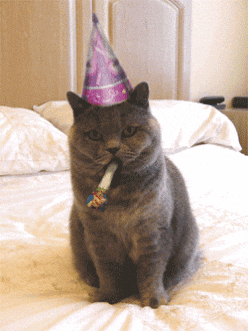
You’ve got to be kitten me!

There’s no way to require external resources with Sprockets, so let’s add a javascript_include_tag to our application.html.erb file.

Now our kittens have no errors in the Javascript console! What a happy meow-ment!
Integrating Components
Portfolio
Now that all of our dependencies have been required, we can start grabbing some claw-some components from the Bootstrap theme. If we Inspect Element for the portfolio, we can find the start of the portfolio code. We’ll copy the line <section class="module">, and our clipboard will contain all of the code between the start and end of the section element.

Let’s paste that into a new document. Now, we have to decide which bits of that code we want to integrate into our Rails views, and, more speficially, what needs to be dynamic. We’ll want a portfolio item for each of our cat items, so let’s copy the list items code.

Now, let’s paste that into an ERB each loop:

We know that whenever we have li elements, we’ll want a ul element to wrap the list items, so we’ll grab that ul element, as well as the section and container div, from the theme code, and paste them before our ERB @cats.each loop.

And we’ll close the ul, div, and section tags after our ERB end – bonus points fur spotting the mis-indentation:

If we refresh the page now, we’ll get a gallery full of broken images. How a-paw-ling! In order to see our adorable cats, we replace the img element with our ERB image_tag.

Refresh the page! Kittens!

BUT. Our kittens are still named “Corporate Identity”. That’s not a great name for one kitten, let alone many. So let’s replace “Corporate Identity” with the identifier Cat <%= cat.id %>.

Now, we can hover over our kittens in the gallery to get their IDs!

Filters
Now that the gallery is functioning properly, we can add filters. Let’s copy the <div class="row"> element, and paste it inside <div class="container">, before the each loop.

The theme’s filters now show up in the browser. Let’s modify them for our cats!

The data-filter in each filter corresponds with the class name in our portfolio items. So, adding a filter with data-filter=".animated" means that clicking on it will keep all elements with the class animated.

So, let’s use ERB to add a class name of animated to each cat list item where cat.animated is true.

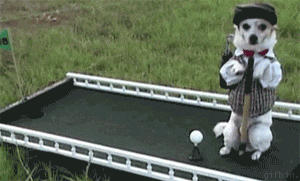
Now, if we click on the “Animated” filter, we’ll get some cat GIFs!

Purr-fect – hooray!
